
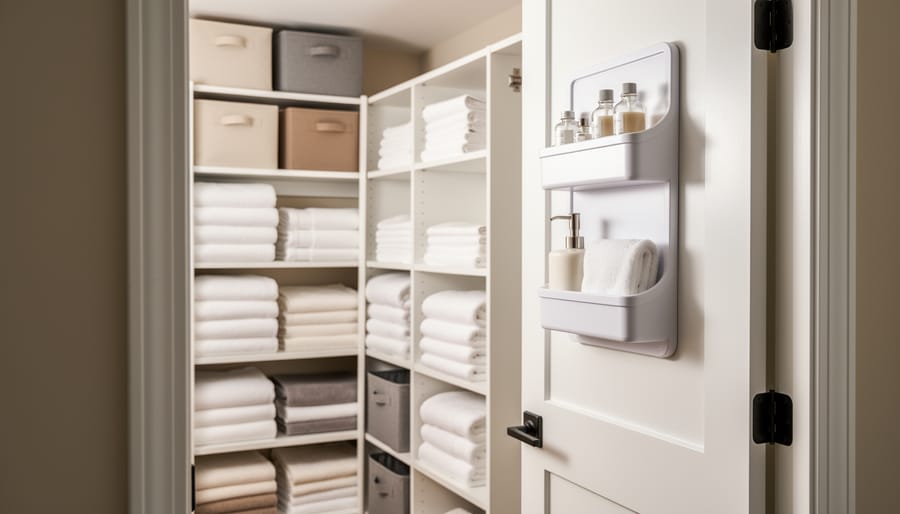
How to Organize a Small Linen Closet in 7 Simple Steps
You can organize a small linen closet in about two to three hours by grouping items into categories, using vertical space with shelf dividers and stackable bins, and storing only what you actually use. The process works because it eliminates clutter, creates designated zones for sheets, towels, and toiletries, and maximizes every square inch through strategic use of organizers and vertical storage.
If you’re constantly battling an avalanche of mismatched sheets or struggling to find a hand towel without dismantling the entire closet, you’re not alone. Small linen closets present a unique challenge: they’re essential storage hubs that rarely offer enough room for everything we need to stash. The good news? With the right approach and a few well-chosen organizers, even the tiniest closet can hold a surprising amount while staying accessible and visually tidy.
The key lies in treating your linen closet like prime real estate. Every shelf and corner needs a job, and everything inside should earn its place. This means ruthlessly editing what stays, then creating a system that’s easy to maintain. Think shelf risers to double your usable surface area, drawer organizers to corral small items, and door-mounted racks to capture dead space.
Professional organizers recommend this seven-step method because it addresses the root causes of linen closet chaos: lack of categorization, wasted vertical space, and keeping items you don’t need. The same principles that work for renter-friendly bathroom storage apply here, too. You’ll spend a few focused hours upfront, but the payoff is a closet that actually functions for your household. No special skills required, just a willingness to be honest about what deserves space and what doesn’t.
What You’ll Need: Essential Tools and Materials
Gather your supplies before you start pulling items out of the closet, it’ll make the process smoother and keep you from stalling mid-project. The good news? You probably already own some of these items, and the rest are available at dollar stores, home improvement centers, or online retailers. Think of this as your organizing toolkit, not a mandatory shopping list. Choose what makes sense for your specific closet layout and budget.
Here’s what professional organizers recommend having on hand:
- Measuring tools: tape measure, notepad, and pen for recording shelf dimensions
- Storage containers: clear bins with lids, wire or woven baskets, and drawer dividers in various sizes
- Space-saving products: shelf risers, tension rods, over-the-door organizers, and vacuum storage bags
- Labeling supplies: label maker, adhesive labels, or masking tape and markers
- Cleaning essentials: vacuum, microfiber cloths, and all-purpose cleaner
The measuring tape is non-negotiable, you need exact dimensions to choose containers that actually fit your shelves without wasted space. Shelf risers essentially double your usable area by creating a second tier, which is critical in small closets where every inch counts. Clear bins let you see contents at a glance, but opaque baskets work fine if you label them clearly. Tension rods turn empty vertical space into hanging storage for bottles or rolled towels.
Budget-friendly swaps work beautifully here. Shoe boxes covered in contact paper replace pricey bins. Cardboard dividers cut from cereal boxes function like drawer organizers. Painter’s tape and a permanent marker serve as labels. Even folded paper plates can create shelf dividers in a pinch.
You don’t need everything listed, a reader with three fixed shelves will skip drawer dividers entirely, while someone blessed with deep shelves might prioritize bins over risers. Start with measuring tools and a few basic containers, then add specialized products only where you spot specific opportunities to gain space.
Before You Begin: Important Considerations and Safety Tips
Before diving into your small linen closet makeover, set yourself up for success with a bit of smart preparation. Block off 2-3 uninterrupted hours on your calendar, rushing through this process defeats the purpose, and you’ll want time to make thoughtful decisions about what stays and what goes. If you’re dealing with bulky comforters, stacks of bath towels, or bins stored on high shelves, grab a friend or family member to help. Moving heavy items solo increases your risk of strain or dropping something on your toes.
Lighting matters more than you’d think. Open curtains, turn on overhead lights, and consider bringing in a work lamp if your closet is dimly lit. You can’t organize what you can’t see clearly, and good lighting helps you spot dust, stains, or issues that need attention. Speaking of heights, use a sturdy step stool or small ladder if you’re accessing top shelves, wobbly chairs are accidents waiting to happen.
Before you place a single item back in the closet, inspect all surfaces for moisture, mildew, or mold. Run your hand along corners and the back wall, and sniff for musty odors. Small spaces trap humidity, especially if towels go back damp. If you discover persistent moisture issues, active mold growth, or structural problems like cracked walls or unstable shelving hardware, call a professional. A handyman can reinforce shelves, and a mold remediation specialist should handle anything beyond surface cleaning. Organizing over a hidden problem just kicks trouble down the road.
Step-by-Step: Organizing Your Small Linen Closet
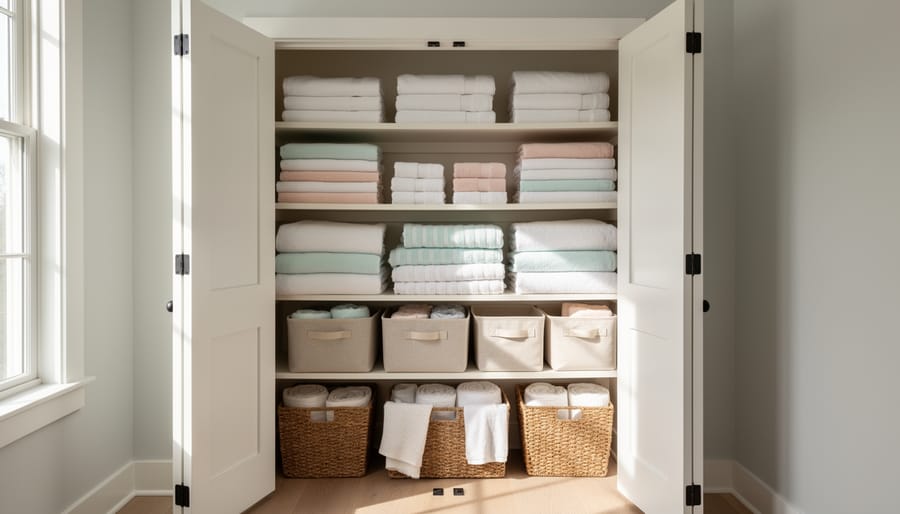
Step 1: Empty Everything and Assess Your Space
Start by pulling every single item out of your linen closet, yes, every towel, sheet, and mystery basket. Place everything in a nearby room where you can see the full scope of what you’re working with. This complete emptying reveals the true dimensions of your space and any hidden issues like dust buildup or shelf damage.
Grab your measuring tape and record the height, width, and depth of each shelf. Don’t skip this step. Those measurements will guide every decision about which storage products actually fit. While you’re measuring, note any quirks: oddly-angled corners, protruding hinges, shallow shelves near the door frame. These details matter when you’re working with limited space.
Now vacuum the entire closet, including corners and the back wall. Wipe down shelves with an all-purpose cleaner to remove dust and any sticky residue. Check for moisture signs, loose shelf brackets, or peeling paint. A clean, stable foundation makes organizing easier and helps your system last.
Take a quick photo of the empty space. You’ll appreciate seeing the before-and-after transformation, and the image can help if you’re shopping for organizers later. This fresh start gives you complete control over what goes back in, and where.

Step 2: Sort and Declutter Your Linens
With everything out of the closet, spread your linens across a bed or large table and sort them into four distinct piles: keep, donate, repurpose, and discard. Inspect each item closely for stains that won’t come out, holes, fraying edges, and worn elastic on fitted sheets. If a towel feels scratchy despite washing or a pillowcase has permanent discoloration, it belongs in the discard or repurpose pile.
Apply the one-year rule ruthlessly: if you haven’t used that decorative table runner or guest duvet cover in the past twelve months, consider letting it go. Count your everyday essentials and be honest about duplicates. Most households need only two sets of sheets per bed and two to three towels per person. In a small linen closet, excess quickly becomes clutter.
Your goal is to reduce your total volume by at least 20 to 30 percent. This breathing room makes the remaining steps dramatically easier and ensures you can actually maintain your new system. Keep only what you genuinely use, love, or need for specific occasions. Everything else is taking up precious inches you can’t afford to waste.
Step 3: Group Items by Category and Frequency
Now that you’ve purged the excess, it’s time to create order. Spread your keepers across the floor or a bed and start grouping similar items together. Everyday bath towels go in one pile, guest linens in another, seasonal bedding in a third. Don’t stop at broad categories, within your towel pile, separate hand towels from bath sheets, group washcloths together.
Think about frequency of use as you sort. Those bath towels you grab every morning? They’re high-priority. The holiday-themed hand towels you pull out twice a year? Low-priority. Create three tiers: daily essentials, weekly or monthly items, and occasional or seasonal pieces.
This sorting phase reveals patterns you might have missed. You’ll quickly see if you have six beach towels but only two hand towels for guests, or if your cleaning supplies have taken over space that linens actually need. Professional organizers recommend physically moving items into priority groups before putting anything back, it’s easier to visualize your system when everything’s laid out.
Once grouped, you’ll know exactly what storage solutions each category needs and where each should live in your small closet.
Step 4: Maximize Vertical Space with Smart Products
Once you’ve decluttered and categorized your linens, it’s time to make every inch count. Start by adding shelf risers, which instantly create a second tier on existing shelves, perfect for stacking folded towels below and storing sheet sets above. This simple hack can nearly double your usable shelf space without any permanent installation.
Next, install tension rods between the closet walls or under shelves. These are lifesavers for hanging spray bottles, small baskets, or even rolled hand towels, keeping them visible and accessible while freeing up precious shelf real estate. If your closet door swings freely, mount an over-the-door organizer with clear pockets for washcloths, travel-size toiletries, or cleaning cloths, items that would otherwise clutter your shelves.
Stackable bins are another game-changer for small spaces. Choose clear or labeled containers that reach nearly to the shelf above, utilizing the full vertical height. This prevents wasted air space and keeps similar items together. For more ideas on maximizing tight spaces, explore proven shelving solutions that work in bathrooms and closets alike. Each of these products addresses the core challenge of small linen closets: they expand capacity upward and outward without requiring more square footage.
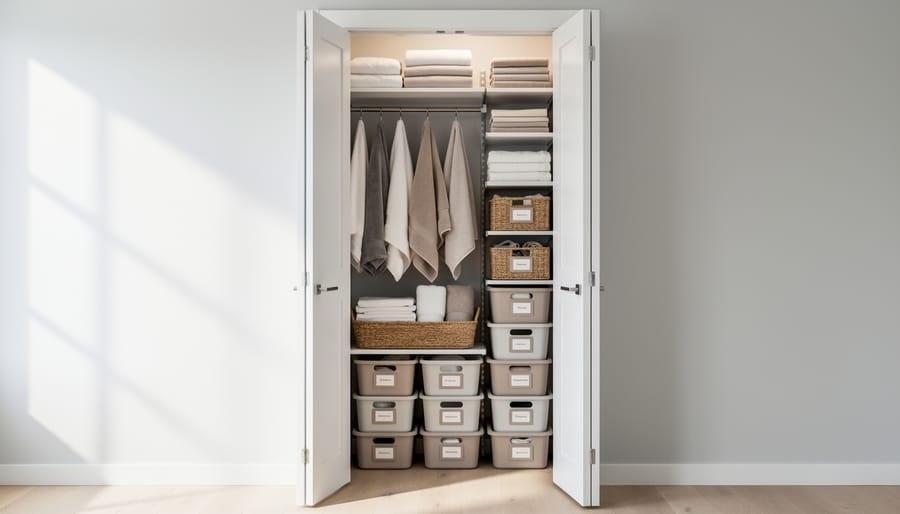
Step 5: Fold and Store Linens Space-Efficiently
How you fold your linens makes a dramatic difference in a small closet. Start with file-folding for towels: fold lengthwise into thirds, then in half, and stand them upright like files in a drawer. This method lets you see every towel at once and pull one without toppling the stack.
For sheets, fold them into neat squares by tucking fitted corners inside themselves, then folding the set into a flat rectangle. Here’s the game-changer: slip the folded flat sheet and pillowcases inside one of the matching pillowcases. You’ve just created a tidy bundle that keeps sets together and takes up half the space of loose folding.
Roll washcloths and hand towels tightly and stand them in small bins. Rolled items pack more efficiently and stay compact.
For seasonal bedding you rarely touch, vacuum storage bags are your secret weapon. They compress bulky comforters and extra blankets by up to 75%, freeing precious shelf space for everyday items. Just label each bag clearly and store them on your highest or deepest shelf where access matters less.
Step 6: Arrange Items by Zone and Priority
Place your daily-use towels and washcloths at waist-to-eye level, the sweet spot for grab-and-go convenience. This prime real estate should hold the linens you reach for every single morning. Position bath towels toward the front, hand towels just behind them, and washcloths in a small bin or basket to keep towels fresh and accessible.
Reserve your top shelves for guest bedding, seasonal items, and backup sets you only need a few times per year. These higher zones work perfectly for bulky comforters and extra blankets, items that take up serious space but don’t require frequent access.
Use bottom shelves or over-the-door organizers for cleaning supplies and toiletries. Heavier items belong low anyway, and this placement keeps potentially messy products contained. Create a dedicated zone for each category: one shelf corner for first-aid supplies, another for extra soap and shampoo, a third for cleaning tools.
The result is a closet where every item has a logical home based on how often you actually use it.
Step 7: Label Everything for Long-Term Success
Once every item has its home, labeling transforms your hard work into a system that actually lasts. Clear labels make it impossible to shove things back in the wrong spot or forget where something belongs.
Start with the most visible storage products, bins, baskets, and drawer fronts. A simple label maker creates crisp, professional-looking tags that stick directly to containers. If you don’t own one, printable labels on adhesive paper work just as well, or try chalkboard labels that you can update as needs change. Write exactly what belongs inside: “Bath Towels,” “Guest Sheets, Queen,” “Cleaning Supplies.”
Don’t stop at containers. Label the shelf edges themselves so everyone knows what zone they’re looking at. This is especially helpful for shared households where multiple people need to maintain the organization. Include any quantity limits if space is tight: “Hand Towels (Max 8)” prevents well-meaning family members from overloading a category.
For sheet sets, label the storage location and the bed size together. “King Sheets, Top Shelf” eliminates the guessing game when you’re making beds in a hurry. Label vacuum storage bags with their contents and the season: “Winter Blankets, Oct to Mar.”
The five minutes you spend labeling now saves countless hours of searching and reorganizing later. When every category is clearly marked, putting things away becomes as easy as taking them out.
How to Know Your Organization Is Working
A well-organized small linen closet should feel effortless to use every single day. The first and most obvious sign your system is working: you can grab any item you need without rearranging other things or digging through piles. If you have to move three stacks to reach one washcloth, that’s a friction point worth addressing. Similarly, the closet door should close smoothly without forcing items back or hearing things topple when you shut it.
Visual calm is another powerful indicator. Open the door and scan the shelves, do they look intentionally arranged, or do they feel like a puzzle about to fall apart? Successful organization often looks almost boring because everything has its place and nothing competes for attention. Each category should occupy its own defined zone, whether that’s a labeled bin, a specific shelf, or a basket on the door.
Test your system for a full week before declaring victory. Pay attention to which items you reach for most often and whether they’re truly in convenient spots. Notice if certain bins get messy again quickly, that might mean the category needs to be split into smaller groups or the container is the wrong size. If you’re still struggling to make towels soft and fresh after organizing, consider adding cedar blocks or lavender sachets to your storage bins.
If something isn’t working after your test week, don’t abandon the whole system. Most issues can be solved by editing one category, swapping a container for a different size, or adding one more shelf riser or tension rod. Small tweaks often make the difference between a system that feels “good enough” and one that genuinely transforms your daily routine.
Common Questions About Small Linen Closet Organization
What if I don’t have any shelves?
Install simple tension rods to hang storage baskets, or mount inexpensive wire shelving units directly to the walls. You can also use stackable bins on the floor and hang an over-the-door organizer to create vertical storage without permanent modifications.
How do I organize when I share the closet with a roommate or partner?
Divide the space into clearly defined zones, top shelves for one person, bottom shelves for the other, or split vertically down the middle. Label each zone and agree on what items are shared versus personal, then schedule a quick monthly check-in to adjust as needed.
Should I store medicines or toiletries in the linen closet?
Avoid storing temperature-sensitive medicines in linen closets, especially if they’re near a bathroom where heat and humidity fluctuate. Everyday toiletries like extra shampoo, soap, and toilet paper are fine, but keep medications in a cool, dry spot like a bedroom drawer.
What’s the best way to keep linens smelling fresh in a small space?
Place dryer sheets, sachets, or small bowls of baking soda on each shelf to absorb odors. Air out the closet weekly by leaving the door open for a few hours, and make sure linens are completely dry before storing them to prevent mustiness.
How often should I reorganize?
Do a quick maintenance tidy every month to refold items and return things to their zones. Conduct a full reassessment twice a year, at seasonal transitions, to purge worn linens, adjust your system, and maximize every inch as your needs change.
These questions reflect real frustrations people face with compact storage. If your closet presents unique challenges, awkward angles, no door, or shared wall space, apply the same principles: create zones, use vertical solutions, and maintain clear boundaries. The goal is a system that works for your specific situation, not a one-size-fits-all template.
You’ve just walked through seven practical steps that prove small linen closets aren’t limitations, they’re opportunities for smart, intentional organization. The compact space that once felt overwhelming can now work beautifully for your household, giving you quick access to everything you need without the visual chaos.
The best part? You’re only a few hours away from this transformation. Start with Step 1 this weekend: empty everything out and really see what you’re working with. Once you’ve sorted, decluttered, and arranged items by zone, you’ll experience those daily benefits, no more digging for clean towels, no more avalanches when you open the door, just calm efficiency every single time you reach for linens.
Your organizing needs will shift over time as your household changes, seasons transition, or you discover new products that work even better. That’s completely normal. Bookmark this guide and come back whenever you need a refresh or want to fine-tune your system.
You’re about to reclaim a space that serves you well every day. That’s worth celebrating, and it starts the moment you pull everything off those shelves.