
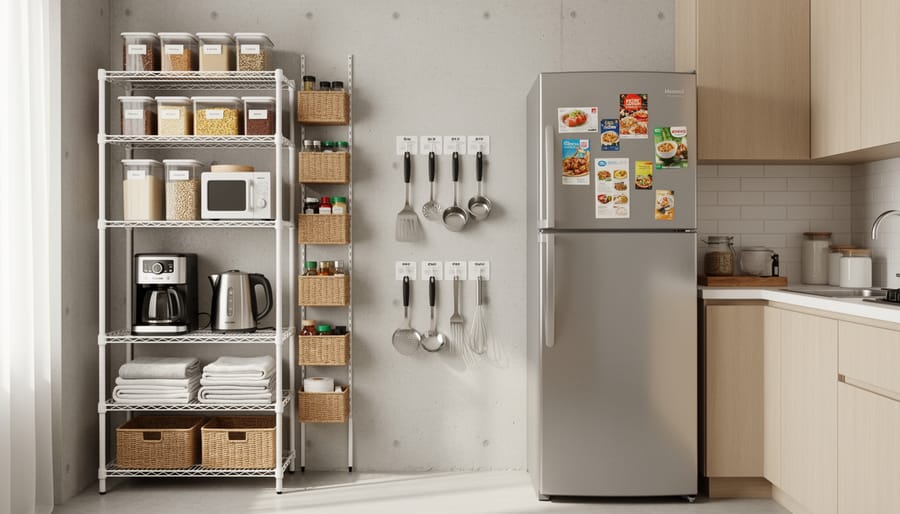
How to Create a Storage Kitchen Nook Without Drilling (A Renter’s Guide)
You can transform an awkward kitchen corner or unused alcove into a high-functioning storage nook in just a few hours using removable shelving, adhesive hooks, and tension-mounted systems that leave zero marks behind. This approach is perfect for renters who need every square inch of storage but can’t risk losing their security deposit to permanent installations.
The beauty of a storage kitchen nook lies in its flexibility. Whether you’re working with a dead space beside the refrigerator, an empty corner near the pantry, or that odd gap between appliances, these no-drill solutions adapt to your specific layout. We’ve collaborated with certified interior designers and professional organizers to develop a straightforward process that maximizes vertical space, keeps frequently-used items within reach, and creates a custom look without touching a single screw to the wall.
This guide walks you through the complete setup, from measuring your space and selecting the right renter-friendly storage components to assembling your nook and testing its stability under real kitchen conditions. You’ll learn which materials hold up to humidity and heat, how to configure shelves for different item weights, and what safety checks to perform before loading up your new storage area. The result is a polished, practical kitchen upgrade that you can take with you when you move.
What You’ll Need: Tools and Materials
Creating a functional storage kitchen nook without drilling requires strategic materials that deliver stability and organization while remaining completely reversible. The beauty of this approach is that everything can be purchased at home improvement stores or online, and you won’t need a single power tool.
Your shopping list breaks down into four main categories:
Adhesive Solutions
- Command hooks in various sizes (rated for 3-5 lbs each for lighter items, heavy-duty versions for up to 7.5 lbs)
- Adhesive mounting strips or rails for hanging baskets and shelves
- Removable adhesive cable clips for cord management
Storage Furniture
- Freestanding baker’s rack or corner shelf unit (metal or bamboo works well in kitchens)
- Rolling cart with multiple tiers (choose one that fits your nook dimensions)
- Stackable wire or plastic storage cubes (optional, for customizable configurations)
Organizational Accessories
- Tension rods (spring-loaded, no drilling required) for creating dividers or hanging storage
- Clear or woven storage bins and baskets in various sizes
- Drawer dividers or small organizer trays for containing loose items
- S-hooks for hanging utensils, mugs, or dish towels from rods and rails
Decorative Touches (optional)
- Adhesive shelf liner or contact paper to protect surfaces and add color
- Label maker or chalkboard labels for identifying container contents
- Small potted herbs or faux plants to soften the industrial look
Keep your receipts for the first few weeks. You may need to exchange hooks for different weight capacities or swap bin sizes once you see how everything fits together in practice.
Safety and Important Considerations Before You Start
Before you hang your first hook or position a shelf, understand the risks that could cost you your security deposit. Start by reading your lease agreement carefully, some explicitly prohibit adhesive products or require written approval for any wall attachments, even temporary ones. Test every adhesive product on a small, hidden area (like inside a cabinet or behind an appliance) and leave it for 24 hours to confirm it won’t lift paint or leave residue when removed. Different surfaces react differently: textured walls, older paint, and porous materials are far more prone to damage than smooth, sealed surfaces.
Consumer Reports testing confirms that proper removal without peeling paint depends entirely on following removal instructions precisely, including waiting periods and using the correct pull angle. Never yank hooks straight off the wall. For freestanding furniture like baker’s racks, check that your floors are level, uneven surfaces can make units wobble and compromise stability. Finally, while you want fresh interior styling prioritize function and reversibility over aesthetics in rental spaces where mistakes carry financial consequences.
Step-by-Step: Building Your No-Drill Storage Nook
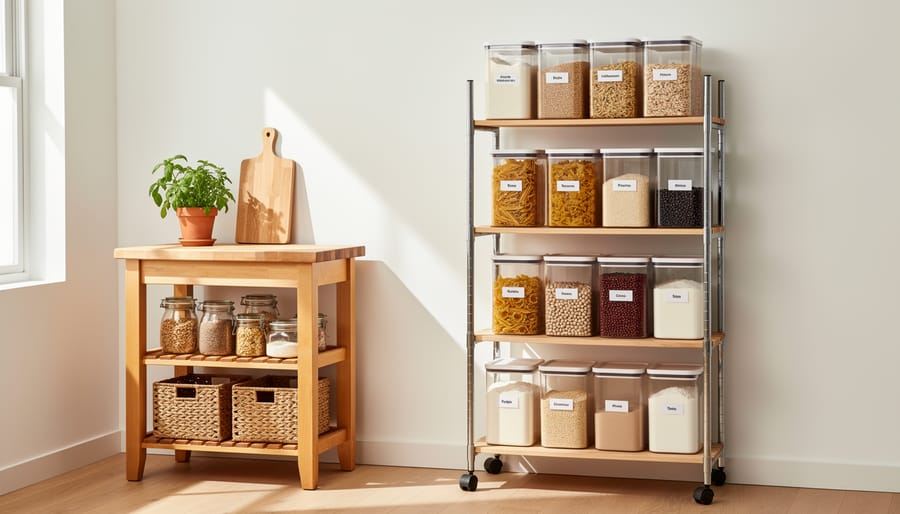
Assess and Measure Your Nook Space
Start by surveying your kitchen for underused areas that could accommodate storage. Corner spaces where two walls meet, the gap beside your refrigerator, or that awkward stretch of wall between your counter and doorway often make ideal candidates. These spots typically go unused but can hold surprising amounts of organizational capacity.
Once you’ve identified a promising location, grab a tape measure and record three dimensions: height from floor to ceiling or the highest point you can comfortably reach, width across the wall or corner space, and depth extending outward from the wall. Write these measurements down, you’ll reference them when shopping for shelving units and containers.
Pay special attention to clearances. Walk through the area and open nearby cabinet doors, the refrigerator, or any drawers to ensure your planned storage won’t create obstacles. Leave at least 36 inches of walkway width for comfortable movement, especially if multiple people use the kitchen simultaneously. Consider sight lines too, you’ll want easy visibility of stored items without crouching or stretching.
Install Adhesive Hooks and Hanging Solutions
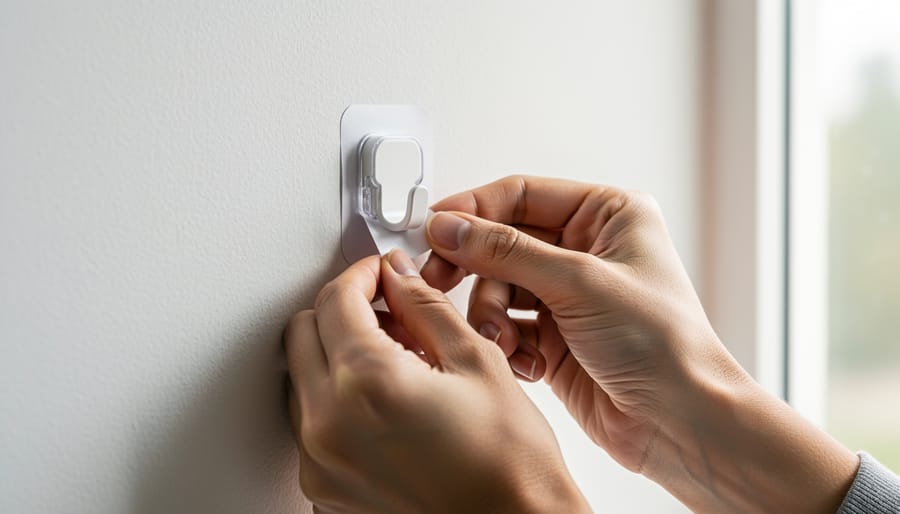
Start by thoroughly cleaning the wall area where you’ll place your adhesive hooks. Use rubbing alcohol on a lint-free cloth to remove any grease, dust, or moisture, kitchen walls accumulate cooking residue that prevents proper adhesion. Let the surface dry completely for at least 15 minutes before proceeding.
When selecting hook placement, consider what you’ll hang and distribute weight strategically. For heavier items like hanging baskets or utensil racks, use multiple smaller hooks rather than one large hook. Position them 6-8 inches apart to spread the load evenly across the wall.
Press each adhesive backing firmly against the wall for 30 seconds, applying consistent pressure across the entire surface. Don’t hang anything for at least one hour, many adhesive failures happen because people load hooks too quickly. Check your product’s specific instructions, as some command strips require 24 hours before bearing weight.
For adhesive rails or pegboard alternatives, mark your placement with painter’s tape first to ensure level installation. Use a smartphone level app if you don’t have a traditional level. Once positioned, press along the entire length, working from center to edges to eliminate air bubbles.
Position Freestanding Shelving and Furniture
Position your freestanding pieces strategically to create maximum storage without sacrificing kitchen flow. Start with the largest item, typically a baker’s rack or corner shelf unit, placing it flush against the wall in your measured nook space. For corner installations, angle the unit so both sides touch the walls for stability without requiring anchors.
Rolling carts work best when positioned perpendicular to the wall, creating an L-shape configuration that keeps frequently used items within arm’s reach while maintaining clearance for cabinet doors and appliances. Leave at least 30 inches of walkway space to meet standard kitchen traffic requirements.
Stack tiered organizers from tallest at the back to shortest at the front, creating a visual cascade that makes every item visible. This layering technique prevents shorter pieces from disappearing behind taller units and gives you instant access to everything stored.
Test stability by gently pushing each piece from different angles. Wobbly units need rubber gripper pads underneath, these inexpensive additions prevent sliding and protect your floors. For particularly tall baker’s racks, position heavier items on lower shelves to create a low center of gravity that resists tipping.
Add Organizational Containers and Dividers
With your structural foundation in place, it’s time to create functional zones that keep everything organized and accessible. Start by grouping similar items together, baking supplies in one basket, snacks in another, cooking oils in a third. This clustering prevents the “where did I put that?” frustration and makes your nook genuinely useful.
Choose containers that fit your shelving dimensions precisely. Measure first, then shop. Wire baskets work beautifully for items you need to see at a glance, while opaque bins conceal visual clutter. For deeper shelves, pull-out baskets or bins with handles let you access items at the back without wrestling everything in front.
Tension rods create instant vertical dividers. Wedge one between shelf sides to corral cutting boards, baking sheets, or pot lids upright. They grip through friction alone, no brackets required, and adjust if you rearrange later.
Add drawer organizers to any pull-out elements, separating utensils from gadgets from miscellaneous tools. The more you divide space into dedicated spots, the more your nook maintains itself between cleanings.
Style and Personalize Your Nook
With your organizational structure in place, transform your functional nook into an intentional design element. Start with labels, adhesive chalkboard labels or a label maker creates a cohesive system while making items instantly findable. Choose a consistent labeling style across all containers for a finished look.
Select a color palette that either complements your existing kitchen or creates a pleasant contrast. Uniform basket colors, coordinating bins, or even matching shelf liner patterns pull the space together visually. If you’ve used mixed storage containers, tie them together with ribbon, washi tape borders, or adhesive vinyl accents in your chosen colors.
Add small decorative touches that don’t compromise function: a miniature potted herb on a stable shelf, a small framed print leaning against the wall, or decorative jar toppers for frequently used ingredients. These personal elements signal that the nook is an intentional part of your kitchen, not an afterthought.
Consider lighting if your nook sits in a dim corner. Battery-operated puck lights with adhesive backing illuminate contents without electrical work, making the space more inviting and practical for daily use.
Testing Your Setup: How to Know It’s Working
After you’ve assembled your no-drill storage nook, resist the urge to load it immediately. Give adhesive hooks and strips a full 24 to 48 hours to cure and bond properly with your wall surface, most manufacturers specify this waiting period for maximum hold strength. During this time, avoid touching or adjusting anything you’ve installed.
Once the curing period has passed, test your setup systematically. Start by adding weight gradually to each hanging element, begin with about 25% of the stated weight limit and check for any signs of slipping or peeling after a few hours. If everything holds, increase to 50%, then 75%, waiting between each increment. Never max out the weight capacity; keeping it at 70-80% of the limit provides a safety margin.
Walk through your daily kitchen routine with the nook in place. Can you open cabinet doors fully? Does the rolling cart obstruct foot traffic when you’re cooking? Reach for items on each shelf to confirm nothing requires awkward stretching or creates a tipping hazard. Inspect all wall contact points under good lighting, look for any paint transfer, adhesive residue bleeding beyond the mounting area, or surface discoloration that could complicate your eventual move-out. If you spot issues now, you can remove and reposition elements before they cause lasting damage.
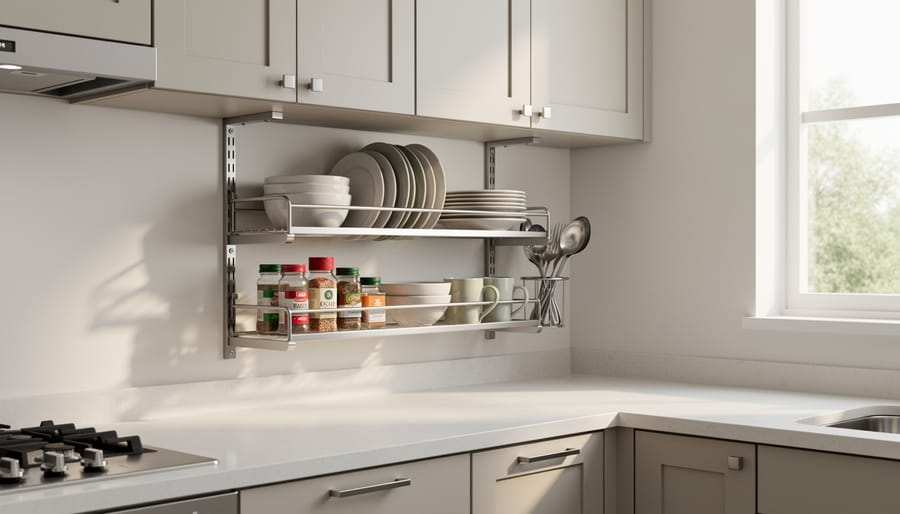
Maximizing Your Storage Nook’s Potential
Once your no-drill nook is functional, shift your focus to making it work harder. Interior designers who specialize in small-space solutions recommend treating your new storage area as a living system rather than a fixed arrangement.
Start by rotating items seasonally. Store your canning supplies and picnic gear in summer, then swap them for holiday baking equipment in winter. This keeps your most-used items at eye level while less-frequent tools stay tucked in back corners or upper baskets. Every three months, reassess what’s actually getting used and what’s just taking up prime real estate.
Vertical space is your best friend in a compact nook. Stack lightweight items in tiered organizers, hang pot holders and dish towels from adhesive hooks on unused wall sections, and use the top of freestanding units for decorative storage boxes. If your nook has any unused ceiling space, consider adhesive ceiling hooks for hanging lightweight baskets, just confirm your adhesive can handle the angle.
Choose furniture that earns its footprint. A rolling cart with a butcher-block top serves as both storage and extra prep space. A corner shelf unit with a towel bar attachment holds dishes and linens simultaneously. When a piece does double duty, you’re effectively getting more storage without claiming additional floor space.
As your system proves itself, look for opportunities to add more space using the same no-drill principles elsewhere. An awkward wall beside the refrigerator or the inside of a pantry door can become your next storage zone, creating a coordinated system that transforms your entire kitchen’s functionality.
Common Questions About No-Drill Kitchen Nooks
Will adhesive hooks really hold heavy items like cast iron pots?
Quality command strips rated for 5-16 pounds can handle moderate kitchen items when properly installed on clean, smooth surfaces. However, cast iron and heavy appliances should go on freestanding shelving units rather than adhesive solutions to avoid damage and safety hazards.
How do I remove adhesive products without damaging the walls?
Follow the manufacturer’s removal instructions exactly, which typically involve pulling the tab straight down slowly rather than outward. Warming stubborn adhesive with a hairdryer on low heat can help release it cleanly without pulling paint or drywall.
Can I create a storage nook in a galley kitchen with limited space?
Absolutely. Galley kitchens benefit from vertical solutions like over-the-door organizers, tension rod systems between cabinets, and narrow rolling carts that tuck into corners. Focus on slim profiles and multi-functional pieces that don’t obstruct your workflow.
What’s a realistic budget for a no-drill storage nook?
You can create a functional nook for as little as fifty dollars using basic adhesive hooks and repurposed containers, while a more comprehensive setup with quality shelving units, matching baskets, and premium adhesive systems might run 150-300 dollars depending on the size of your space.
The beauty of no-drill storage solutions is their flexibility. You’re not locked into one configuration, which means you can experiment until you find what works best for your cooking style and space constraints. If you’re planning broader home improvements and want to understand how storage solutions integrate with other design elements, check out this interior door buying guide for cohesive design planning. Your storage nook should evolve with you, whether that means adjusting shelf heights seasonally or completely reconfiguring when you move to a new rental.